Table of Contents
Embark on a creative journey with our guide on how to ink the Northern Lights. Learn the techniques to capture the ethereal beauty and vibrant colors of this majestic natural phenomenon, ideal for aspiring artists.
Introduction
Inking the Northern Lights, or Aurora Borealis, is a fascinating artistic endeavor.
Capturing their fluid, dynamic, and colorful display offers a unique challenge.
This guide will provide you with the techniques to create a stunning depiction of this natural phenomenon.
Key Takeaways:
- Mastering the art of inking the Northern Lights.
- Selecting tools for creating luminous and vibrant effects.
- Techniques for depicting the lights’ fluid and dynamic nature.
- Enhancing your illustrations with atmospheric depth.
Choosing Your Tools
1. Selecting Inking Tools:
Brush pens are ideal for creating the Northern Lights’ flowing patterns, while fine liners can add details to the landscape.
2. Inks and Colors:
A palette of luminous inks in greens, purples, blues, and pinks is essential to recreate the lights’ vibrant hues.
The Inking Process
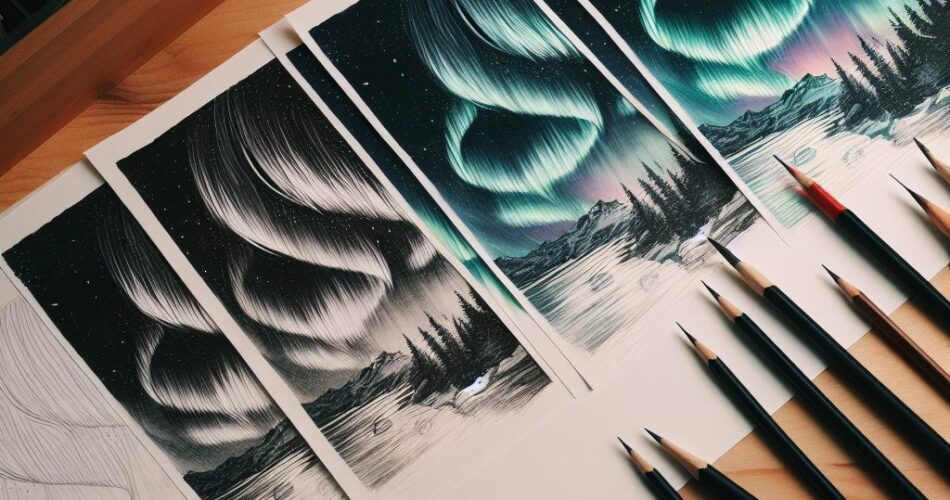
1. Sketching the Background:
Begin with a light pencil sketch of the landscape. This might include mountains, trees, or water.
2. Layering the Lights:
Use brush pens to layer inks, creating the flowing, curtain-like appearance of the Northern Lights. Blend colors where they meet for a natural transition.
3. Adding Depth and Texture:
Introduce darker colors at the edges and lighter colors in the center to create depth. Use a dabbing technique to add texture.
4. Detailing the Landscape:
With fine liners, add details to the landscape, ensuring it complements but doesn’t overpower the lights.
Enhancing Your Artwork
1. Atmospheric Effects:
Consider adding subtle ink washes to the sky and landscape for atmospheric depth.
2. Capturing Movement:
Use sweeping, curved strokes to convey the Northern Lights’ movement across the sky.
FAQs on How to Ink Northern Lights
Q: How can I make the colors of the Northern Lights pop?
A: Use luminous or fluorescent inks and layer them over a dark background for contrast.
Q: What is the key to creating a realistic Northern Lights effect?
A: Focus on the fluidity of your strokes and the blending of colors to mimic the natural flow of the lights.
Q: Can I use black ink for the background?
A: Yes, a dark background, like black or deep blue, can enhance the vibrancy of the Northern Lights.
Q: How do I balance the Northern Lights with the rest of the scene?
A: Keep the landscape relatively simple and dark so that the lights remain the focal point of your illustration.


