Table of Contents
Always wanted to try ink art but don’t know how to start? Well, you’re in the right place! In this article, we’ll go step by step from the initial design, the inking procedure, and the final touches to your first ink drawing, I’m sure you’re eager to start. Let’s dive right in!
Step 1: The Pencil Sketch
What you need to start:
- Paper (Watercolor paper preferably)
- Pencil
- Eraser
- Ink Pens
Sketching allows you to plan out your drawing, giving you an idea about the final look of the drawing and where to place the details for a lovely ink illustration.
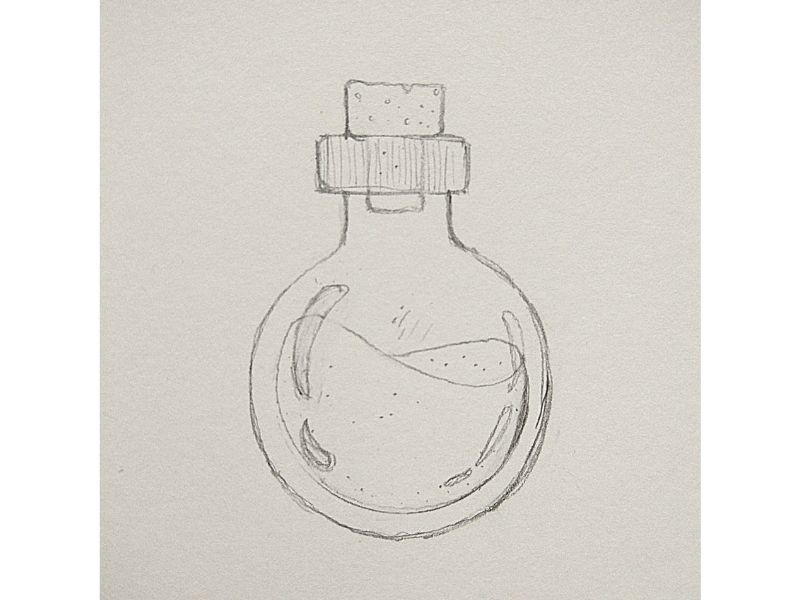
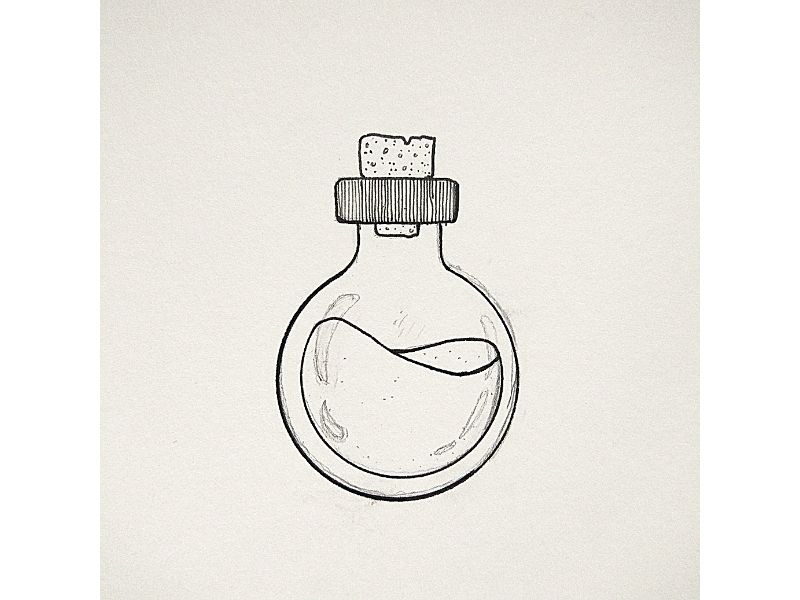
Roughly outline your drawing with your pencil. See the image above. At this stage, be vague and focus on the drawing’s main shapes and details position. For instance, here I’ve roughly placed the position of the hatch for the bottleneck region. Similarly, the same principle applies to the cork details and the glass reflection.
Step 2: Outline Inking
Take your courage in both hands! It’s inking time! Start inking from top to bottom, this prevents smudging of the ink all over your drawing. Firstly, we’ll start from the bottle’s cork, the bottle’s neck, and the liquid content as shown in the image below.
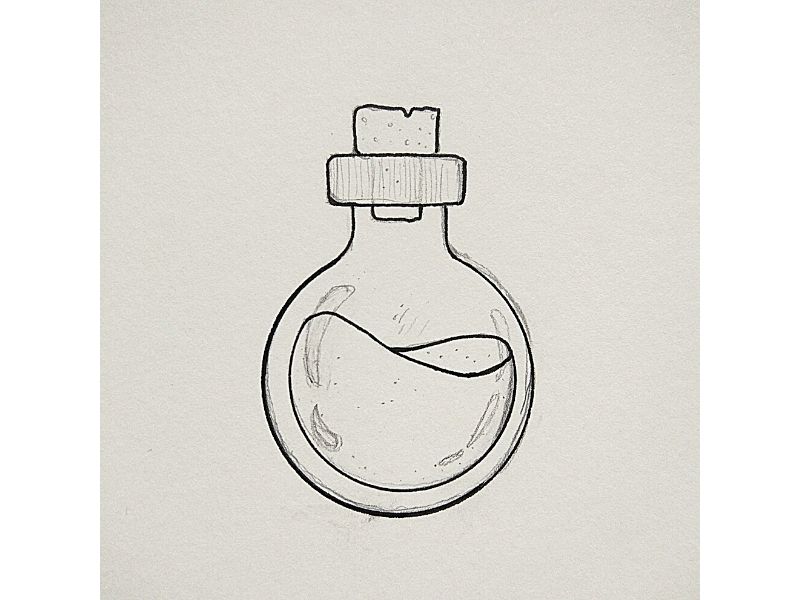
Tip: The use of a compass and stencils can definitely improve your ink illustrations. In this drawing, I’ve used a compass and a circle stencil to obtain a smooth and clean result for both the bottle’s outline and its contents.
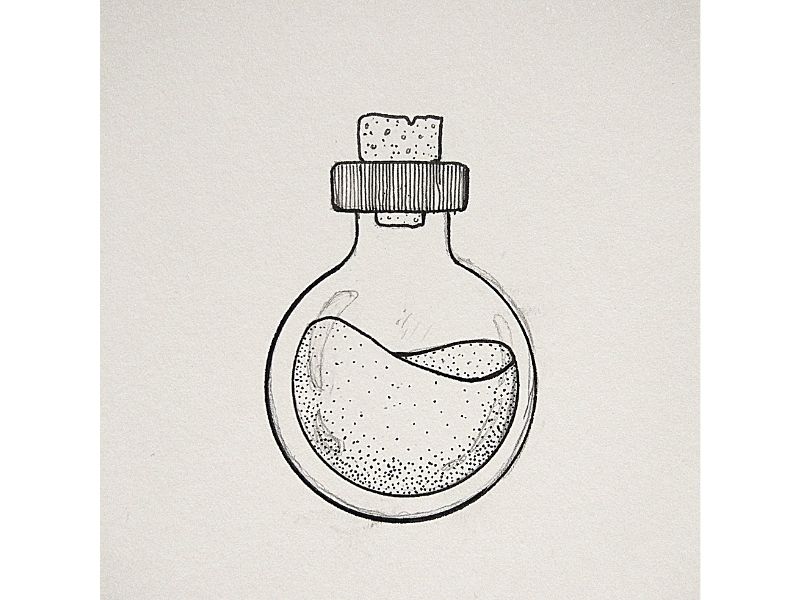
Step 3: Ink Art Elements – The Cork
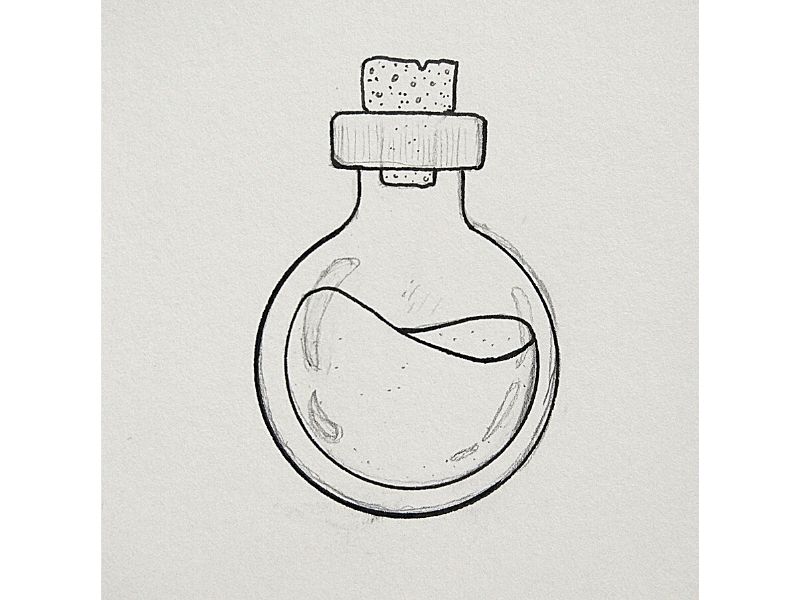
We can now bring to life our bottle. For the cork, we’ll employ the stippling technique in combination with small circles. Use the pencil sketch as a reference for your inking process. A smaller pen nib size will improve the details of your drawing at this stage. A 0.3 mm fine liner pen was used for the bottle outline, here we will switch it down to a 0.1 mm fine liner pen.
Learn more about stippling in this article.
Step 4: Ink Art Details – The Bottle Neck
The hatching ink technique is used for the bottleneck. Use Light parallel lines to obtain a uniform shading on the neck of the bottle as demonstrated below. Make sure to grab your pen perpendicular to the surface of the paper to ensure a smooth ink flow.
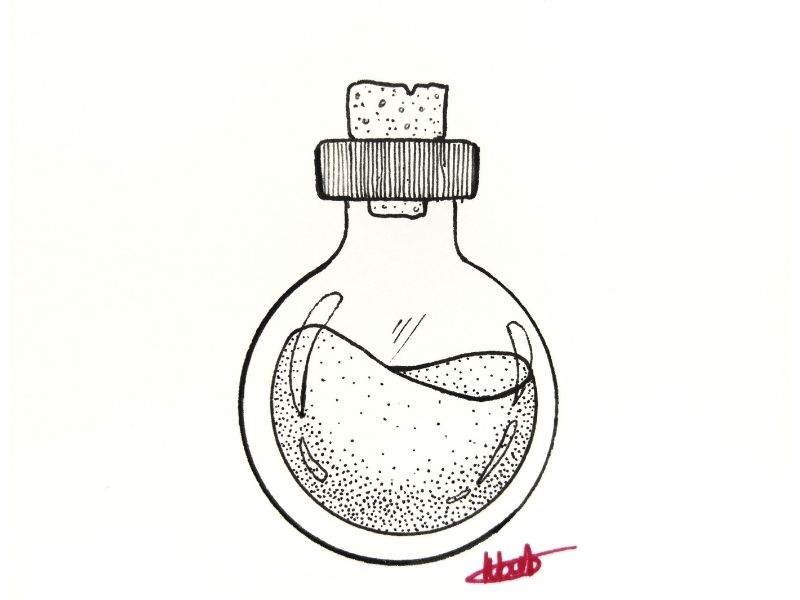
Step 5: Ink Art Elements- The Liquid
For the liquid inside the bottle, the stippling technique is again used. The use of this technique allows better control over the shading and texture of the drawing. To ensure a tidy result, your dots should be uniform and evenly spaced as shown below.
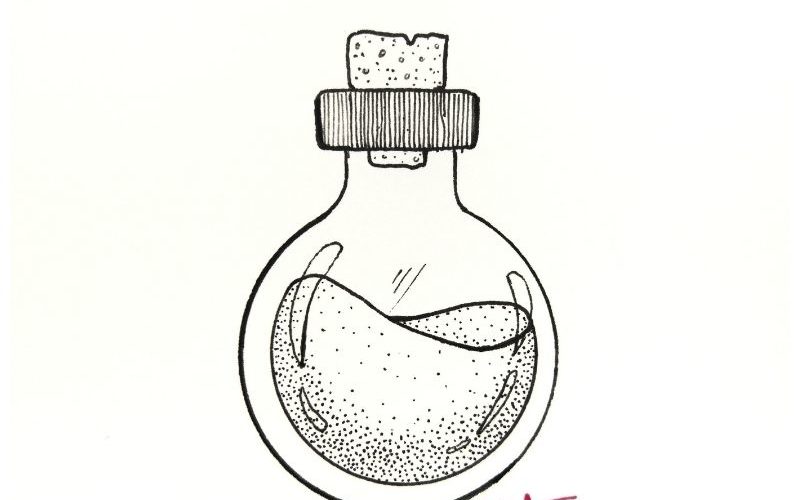
Step 6: Final Touches
To create the reflection on the bottle, use a light grip and place it at the curvature of the bottle to create a realistic effect. Voilà, your inking process is done! Most importantly, let your ink soak up in your paper for 10-15 mins before using an eraser to remove all the pencil marks previously made.
Conclusion
You have now inked your first drawing! You deserve to show it off to your friends and family. Feel free to try out the techniques discussed above to sharpen your skills. Don’t forget to tag me @garabato_de_centavo_azul on Instagram with your fabulous creations.
Let me know if this article was helpful and if you have any questions for me, I’ll be happy to help you here.


